Manage your benefit categories and allowances
Unlike other benefit programs on the market, Wallit doesn't require customers to choose from a catalog. Wallit works with all retailers in every category, everywhere.
Wallit makes it easy for companies to provide customizable and comprehensive benefit programs that meet the diverse needs of their teams – all within a single platform. With Wallit, employees have the flexibility to choose what works best for them, from meal delivery to at-home yoga videos. From national retailers to independent, locally-owned businesses, such as gyms, coffee shops, restaurants, etc.
Step 1: Manage your benefit categories
Investing in your employees happiness and company culture is essential to the growth of your business.
With Wallit, you choose the wellness benefits that make sense for your team and company culture. You do this by giving your team a monthly spending allowance and selecting from Wallit's benefit categories that you want Wallit to automatically validate and reimburse.
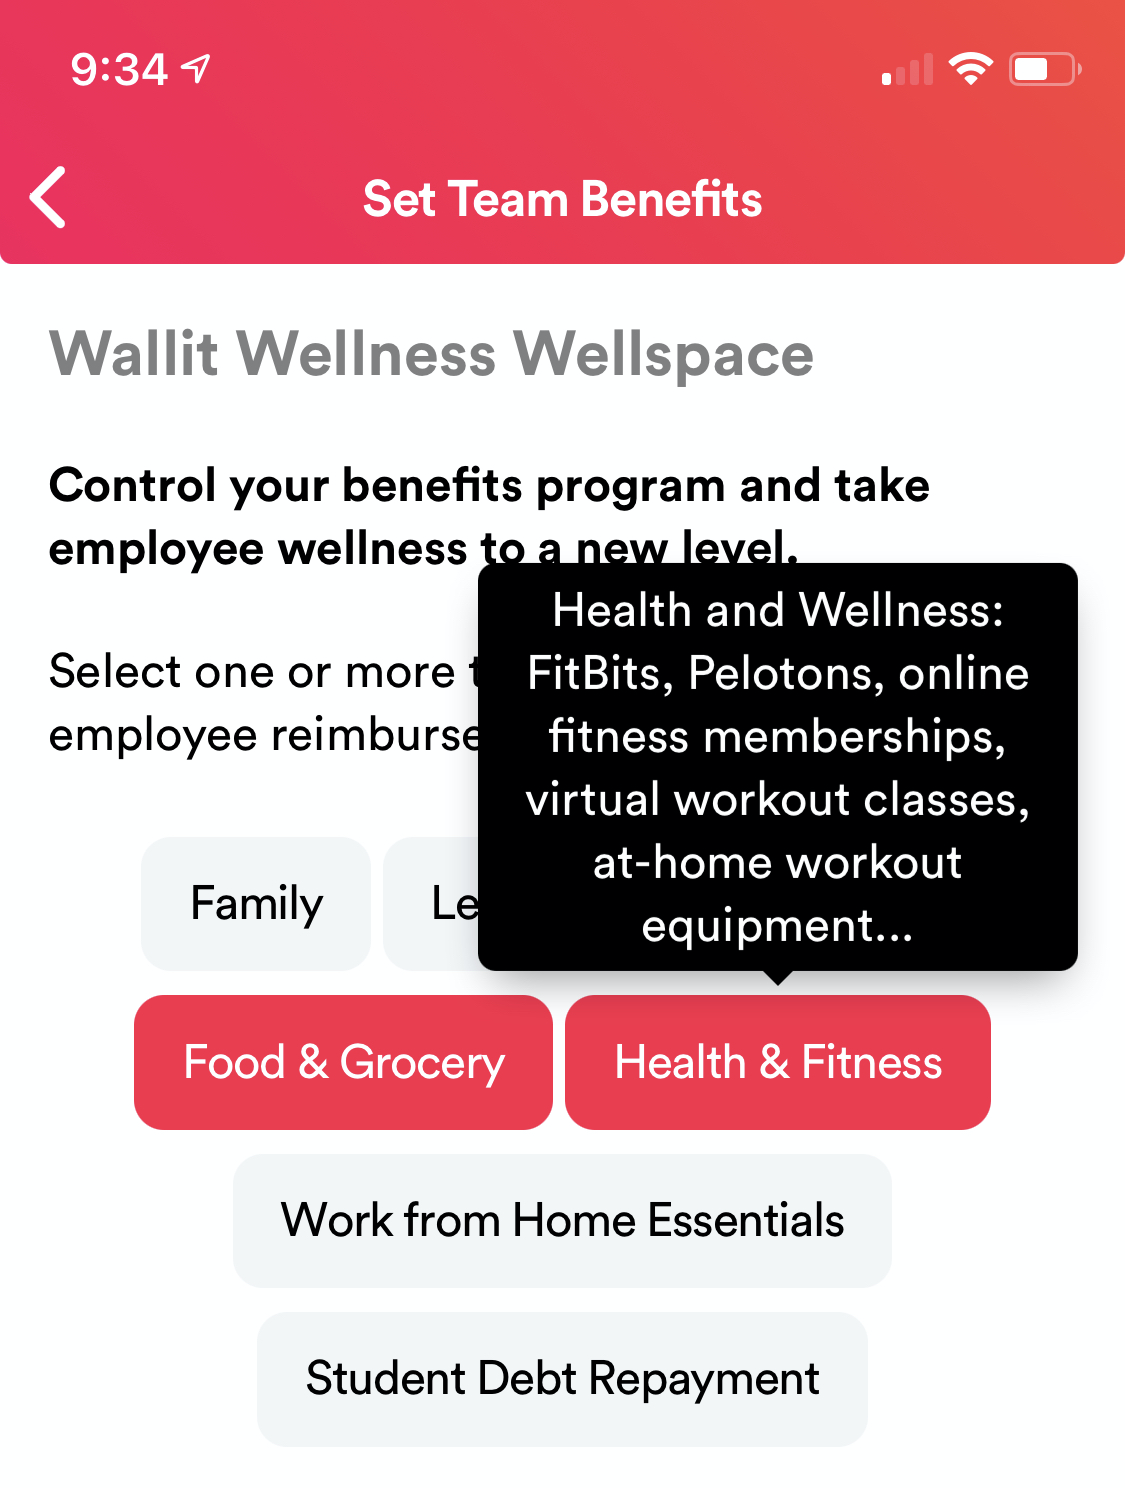
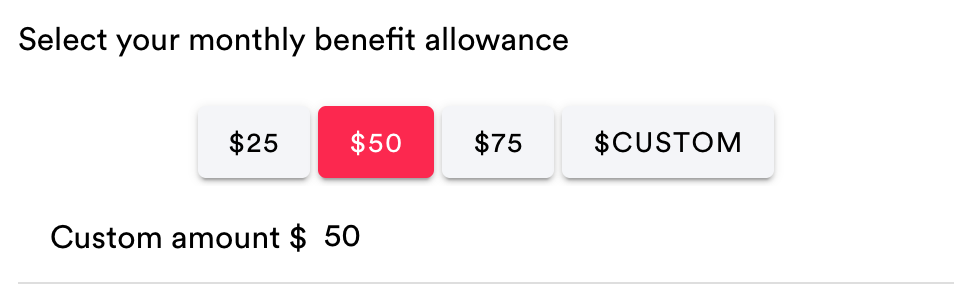
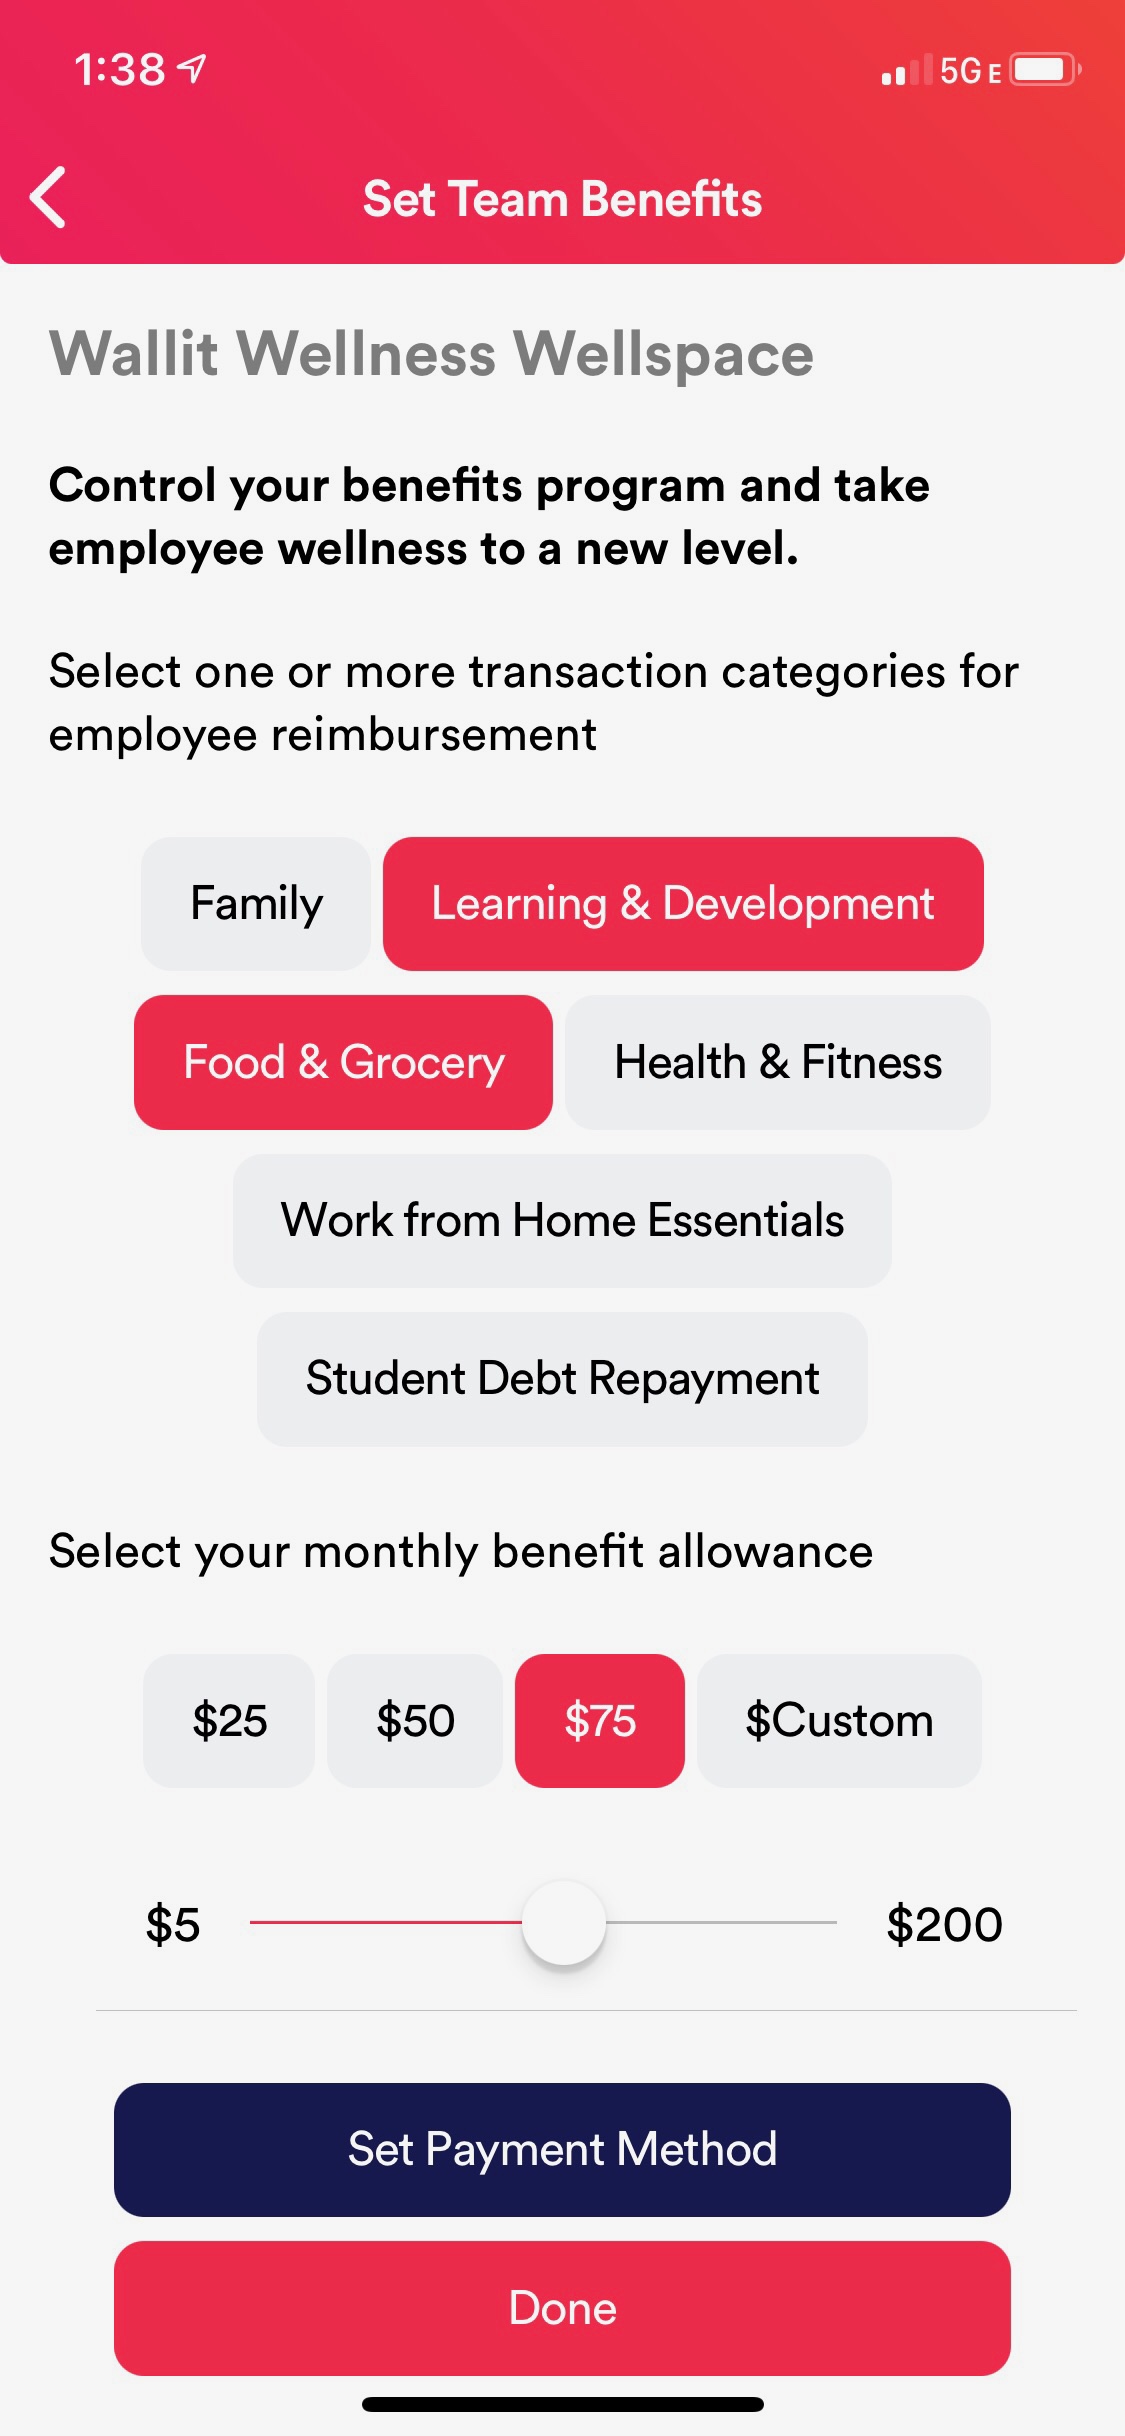
Example Screenshot
Desktop
- From your desktop, go to your Wallit wellspace.
- Click the Menu button (three horizontal lines) in the upper left corner.
- Click Wellness from the menu options.
- Click the Edit button next to the "2. Benefits" section.
- Click the category or categories for employee reimbursement.
- Click the Done button when you're finished making changes.
Mobile - iOS and Android
- From your mobile device, open your Wallit app.
- Tap the Menu button (three horizontal lines) in the upper left corner.
- Tap Wellness from the menu options.
- Tap the Edit button next to the "2. Benefits" section.
- Tap the category or categories for employee reimbursement.
- Tap the Done button when you're finished making changes.
Step 2: Manage your benefit allowance
Allowances are fixed, recurring amounts of money that you give your team(s) for spending on their wellbeing at any retailer - online and offline - large and small.
Unused allowances balances rollover every month or year. Common examples might include:
- $50 per month to be used on Fitness, Health or Mental Wellness
- $500 per year to be used on Education or Professional Development
- $25 per month to be used on Work from home essentials
Example Screenshot
Desktop
- From your desktop, go to your Wallit wellspace.
- Click the Menu button (three horizontal lines) in the upper left corner.
- Click Wellness from the menu options.
- Click the Edit button next to the "2. Benefits" section.
- At the "Select your monthly benefits allowance" section, click the dollar amount or use the slider to choose a custom amount to reimburse.
- Click the Done button when you're finished making changes.
Mobile - iOS and Android
- From your mobile device, open your Wallit app.
- Tap the Menu button (three horizontal lines) in the upper left corner.
- Tap Wellness from the menu options.
- Tap the Edit button next to the "2. Benefits" section.
- At the "Select your monthly benefits allowance" section, tap the dollar amount or use the slider to choose a custom amount to reimburse.
- Tap the Done button when you're finished making changes.
FYI: You can change your benefit categories or allowance amount at any time. You and your team are in control of your organizational wellness.
Tip: Need even more control or customization? Upgrade your free wellspace to a paid plan for accessing more Wallit features and removing reimbursement transaction limits.
Wallit
Where wellness happens.